Understand the meeting, stay responsive, and keep your flow in real time.
This guide walks you through the fastest way to start using COALA-LiVE, what each Dashboard area does,
and how to work confidently inside the Overlay during a live meeting.
What this page covers
You will see three practical sections: a quick start checklist, a Dashboard walkthrough, and an Overlay
walkthrough.
Best for
Job interviews, global meetings, online classes, and high-stakes calls where you need live support.
Works like
A standalone desktop overlay that sits over your meeting window instead of joining as a bot participant.
You will learn
How to prepare context, check devices, start a session, use live guidance, and review the meeting report.
0. Quick Start Guide
Get ready for your first COALA-LiVE session.
COALA-LiVE listens to your meeting audio, tracks the live topic, supports your responses, and creates a
report after the session. Think of the Dashboard as your control room and the Overlay as your live
in-meeting workspace.
Before you start
These checks save time and prevent the most common setup issues.
Grant audio permissions.Allow COALA-LiVE to access your microphone and audio capture permissions before the meeting starts.
Use a supported meeting app.COALA-LiVE is designed to work alongside Google Meet, Zoom, Microsoft Teams, and similar desktop-based meeting flows.
Decide your languages.You can set the meeting language, translate language, and UI language from the Dashboard before you open the Overlay.
Check your audio devices.Make sure the Dashboard detects the system audio path you want to capture and the microphone you want to monitor.
Prepare meeting context.If you want more relevant suggestions, gather any resume, job description, lecture slides, notes, or project files you may want to attach in the Overlay.
Remember your screen sharing choice.Other participants only see COALA-LiVE if you intentionally share a screen that includes the Overlay.
Your first meeting in 6 steps
Follow this order once, and the product flow becomes very intuitive.
Open the Dashboard
COALA-LiVE opens into the Dashboard first. This is where you manage languages, devices, reports, account tools, and the start button for a new live meeting.
Set your three language choices
Choose the meeting language for transcription, the translate language for live support, and the UI language for the app itself.
Confirm audio capture
Use the Dashboard device meters to confirm COALA-LiVE is pointed at the correct system audio path and microphone input before the meeting begins.
Click Start New Meeting
This opens the Overlay, which is the live working surface that stays on top of your meeting app while the conversation is happening.
Use the Overlay during the meeting
Watch the Live tab, add files or notes in Context, and review suggestions or history in Board. Use quick actions whenever you need help responding.
End the session and review the report
When the meeting ends, COALA-LiVE prepares a report you can reopen later from the Dashboard report list.
A. Using the Dashboard
The Dashboard is your control room before and after the meeting.
The Dashboard combines meeting launch controls, report history, report viewing, device selection,
language settings, and support tools in one place. If you are not actively in the Overlay, this is the
screen you will spend the most time with.
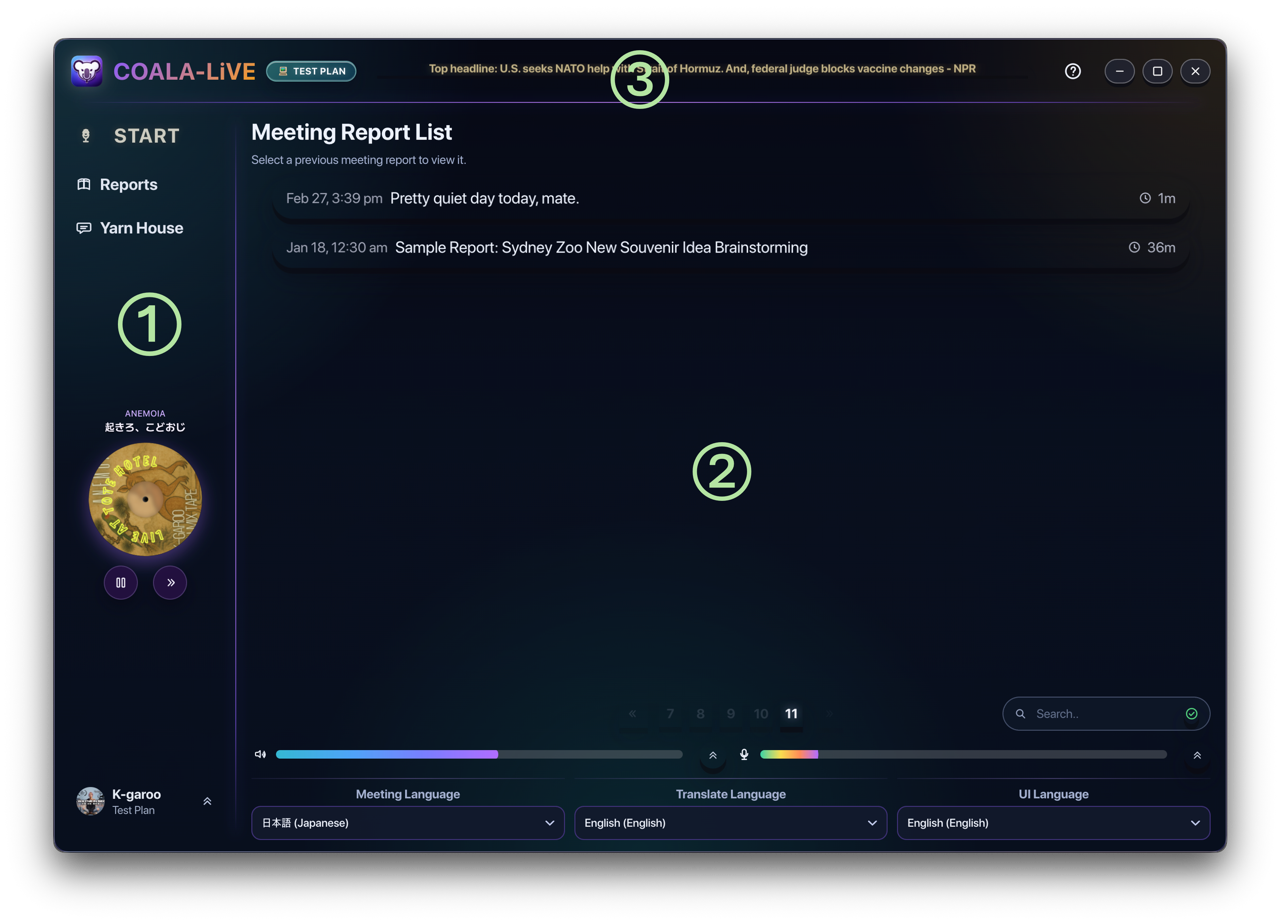
Dashboard overview
Here is the fastest way to think about the layout.
① Side Bar
Start button, section switcher, mini player area, update state, and account entry points.
② Main Area
Report list or report viewer, plus the shared device and language controls used before each session.
③ Top Area
Plan badge, headline ticker, window controls, and the current guide entry point inside the desktop app.
Start New Meeting
The fastest route into a live session.
The large start control in the sidebar opens the Overlay for a new meeting.
The action can be blocked if audio devices are missing, the account is restricted, or meeting usage is unavailable.
Set your languages and devices before you press it so the Overlay launches in the right state.
Think of this button as “I am ready to enter live mode now.”
Meeting Report List
Your meeting archive lives here.
Every completed session can appear in the meeting report list.
You can page through past sessions, reopen them, and search reports by title or content.
If a report is still processing, COALA-LiVE keeps the status visible until it is ready.
This area is the default place to revisit summaries, transcripts, and board history after a meeting.
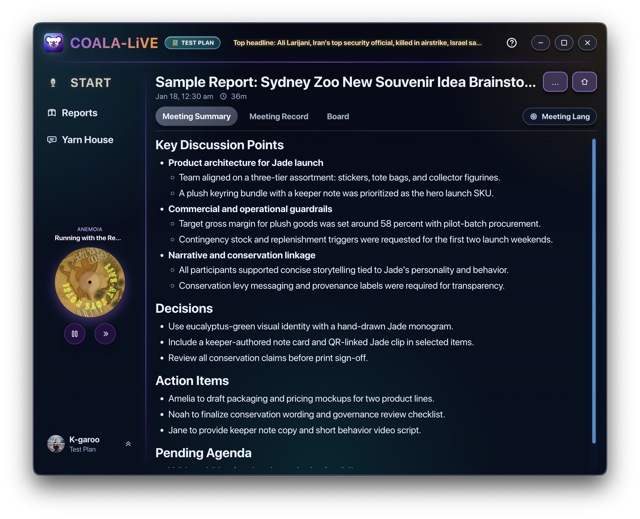
Report Viewer
When you open a report, the main panel switches into a focused viewer.
Meeting Summary
Read the main discussion points, decisions, action items, and pending agenda. This is the quickest way to understand what happened without rereading the full transcript.
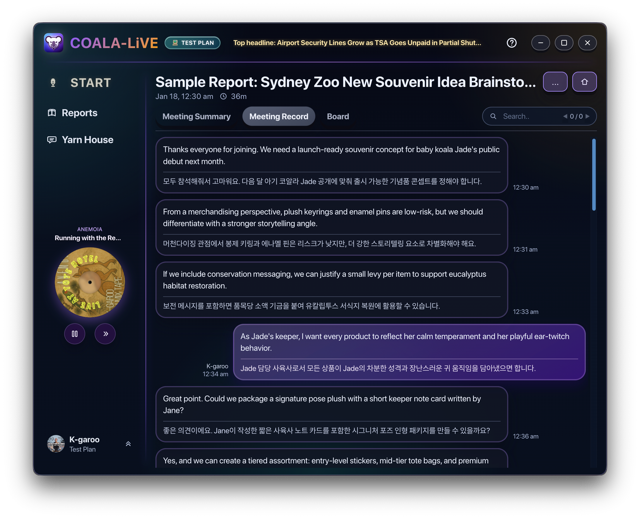
Meeting Record
Review transcript history in detail and search within the record. This is useful when you need exact wording or want to jump to a specific moment in the meeting.
Board
Review the suggestion history generated during the session, including intent cards, quick translate, quick question results, and the wordpad snapshot.
Viewer actions
Reports can be renamed, downloaded as CSV, or deleted from the viewer menu. Use the back action to return to the main list.
Language panel
These three selectors define how the session behaves.
Meeting Language tells COALA-LiVE which language to expect from the live conversation.
Translate Language controls the language of the live support text and translation output.
UI Language changes the interface language of the app itself.
It is best to confirm these before opening the Overlay because live sessions lock some language changes.
Audio device panel
Use this panel to check what COALA-LiVE can hear.
The system audio meter shows whether the meeting output path is active.
The mic meter shows whether your microphone input is active.
Each meter has a device picker so you can switch to another source before the meeting starts.
If you choose the wrong path here, the Overlay may open successfully but have weak or missing live results.
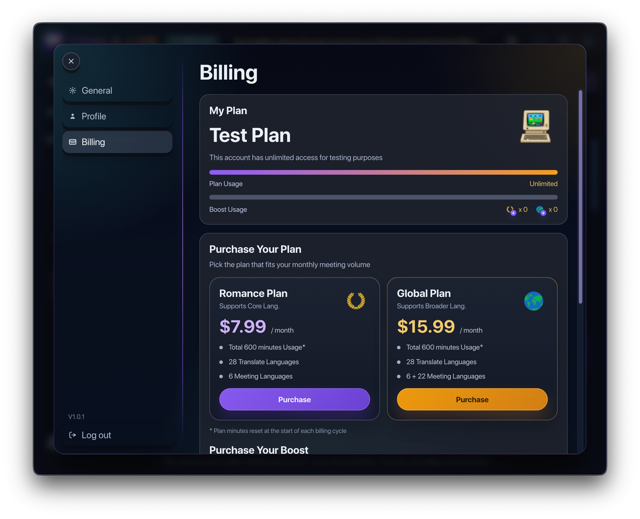
Account Center
Account Center collects the personal and subscription controls that are not part of a single meeting.
Update profile identity such as display name and profile image.
Review billing state, subscription options, and plan details.
Adjust dashboard controls like font size, mic sensitivity, and music player volume.
Manage profile language and communication preferences in one place instead of repeating them every session.
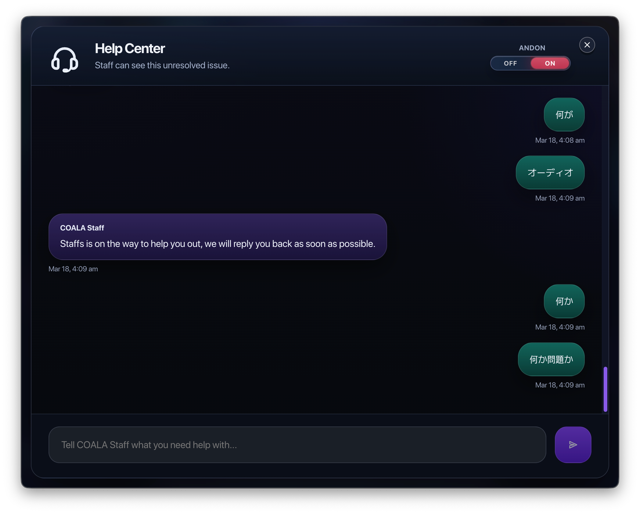
Help Center
Use Help Center when you need direct support from COALA staff.
You can open an ongoing support thread, send messages, and load earlier message history.
The ANDON state helps flag whether an issue is still unresolved or already handled.
This is the right place to report a room issue, ask for troubleshooting help, or continue a support conversation.
If something breaks mid-workflow, Help Center is part of the Dashboard so you do not have to leave the app to get help.
B. Using the Overlay
The Overlay is where COALA-LiVE supports you while the meeting is happening.
Once you start a session, the Overlay becomes the live workspace that sits above your meeting window. It
is designed to keep you oriented, show the current topic, help you react faster, and preserve useful
history while the conversation continues.
Overlay Overview
Remember the three tabs and the top controls.
Live
Watch the meeting unfold, track the current topic, and request fast response help.
Context
Paste notes, attach files, and save meeting context so suggestions are grounded in your materials.
Board
Review history for suggestions, translations, questions, and difficult-word notes without leaving the meeting.
Start, Pause, and End the session
The top bar controls your live capture state.
Start begins live transcription and the real-time support flow.
Pause temporarily stops the live session when you need a short break.
Resume continues the live flow after a pause.
End session happens through the close flow when you are done, and it starts report preparation.
You can also collapse the Overlay if you want it to take less space without fully closing it.
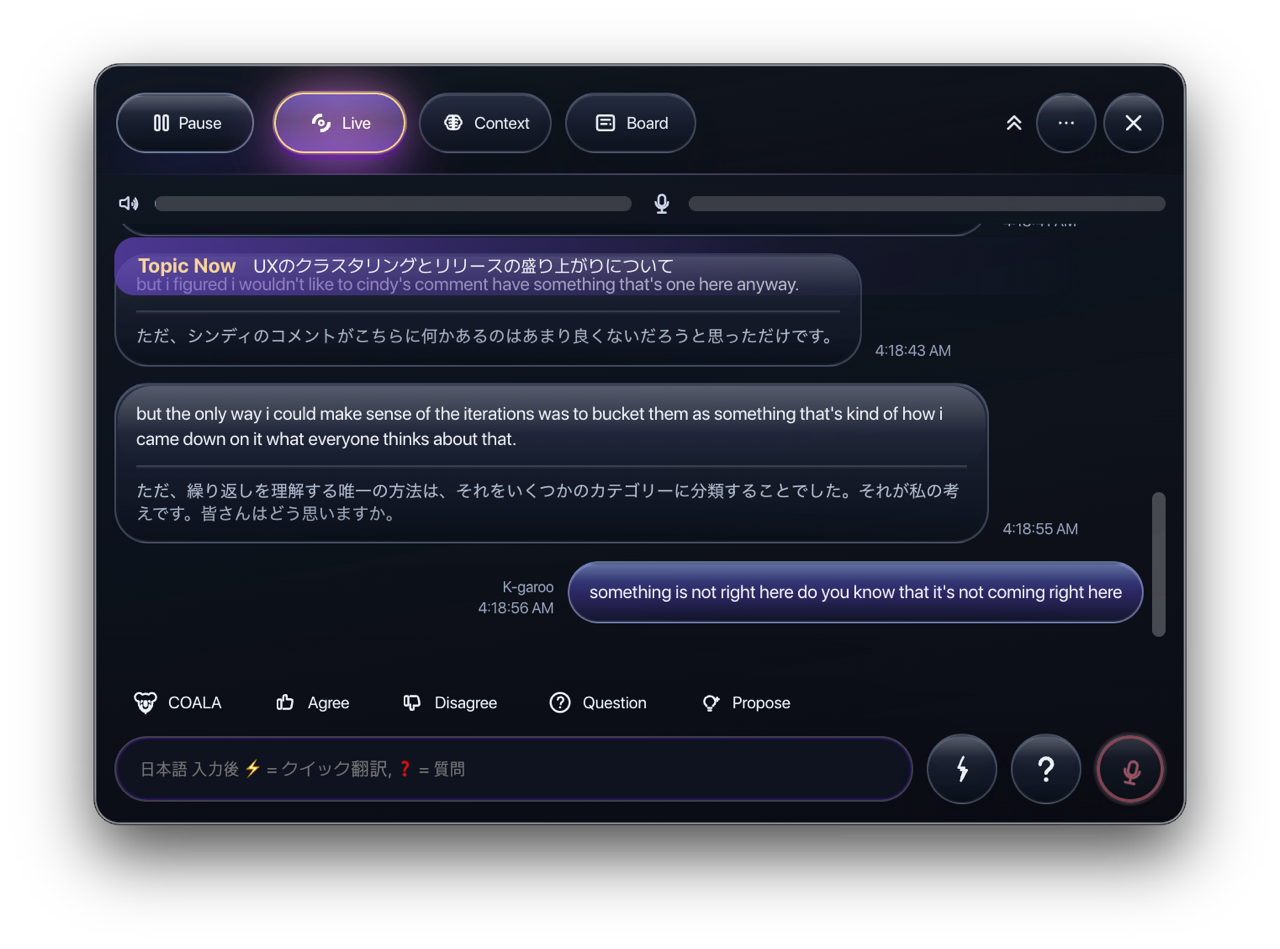
Live tab
This is the main in-meeting surface.
Watch the current topic so you always know what the conversation is centered on right now.
Read live bubbles for meeting audio and your own mic-side activity as the session develops.
Use the ticker area and transcript flow to stay oriented even when speech is fast or context shifts.
Keep an eye on the audio meters if you suspect input or system capture changed during the call.
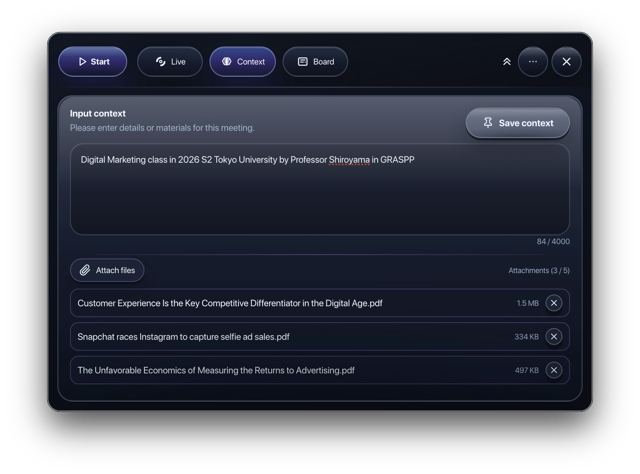
Context tab
Use Context when generic live AI is not enough and the meeting needs your specific materials.
Paste meeting notes, goals, facts, decision points, or key talking points directly into the text area.
Attach supporting files such as TXT, PDF, DOC, XLS, CSV, JPG, or PNG. The interface supports up to 5 attachments and warns on unsupported or oversized files.
Use Save Context so the active session can keep grounded suggestions tied to your own information.
This tab is especially useful for interviews, presentations, lectures, and any meeting where your own material matters more than generic phrasing.
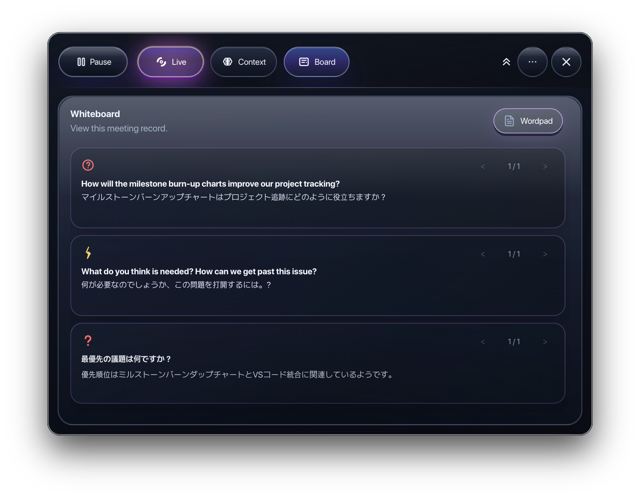
Board tab
Board helps you look back without losing the meeting.
Review intent history if you want to see earlier agree, disagree, question, or propose suggestions.
Review quick translate and quick question history without rerunning the same request.
Open Wordpad to revisit marked words, meanings, examples, and where they came from.
Use Board when you need continuity during a long meeting but do not want to scroll through the entire live stream.
Overlay Actions
Quick actions are there for the moments when you need help right now.
Agree
Generate support for polite alignment, confirmation, or a clear “yes” with better wording.
Disagree
Generate a softer or more structured counterpoint when you need to push back without losing tone.
Question
Ask for help turning uncertainty into a sharp clarifying question.
Propose
Draft a suggestion, next step, or alternative approach when you want to move the discussion forward.
Quick Translate
Type into the quick input field and use the fast translate action when you need immediate language help.
Quick Question
Use the same input area to ask a direct question grounded in the current meeting context.
What happens after the meeting
Ending the live session moves you back into the Dashboard workflow.
COALA-LiVE stops the live transcription and connection workflow.
The session moves into report preparation.
Once ready, the meeting becomes available in the Dashboard report list.
From there, open the report viewer to revisit the summary, transcript record, board history, and wordpad snapshot.