COALA-LiVE logo COALA-LiVE Setup Guide

COALA-LiVE Setup Guide

Set up audio permissions and recover blocked installs with confidence.

This one-page setup guide consolidates macOS permission setup and Windows troubleshooting flows into one practical sequence you can follow during onboarding.

Security note

Some steps temporarily relax browser or system protection to complete setup. Re-enable default protections immediately after COALA-LiVE is installed and running.

Best for

First-time setup on macOS and Windows, especially when permissions or security blocks interrupt installation.

This page covers

macOS Screen & System Audio permission, Windows default speaker setup, and Windows download block recovery.

A. macOS setup

Allow Screen & System Audio Recording on macOS

If COALA-LiVE cannot capture meeting audio on macOS, this permission flow is usually the blocker. Complete the three checks below in order.

macOS

Step 1. Open Screen & System Audio Recording

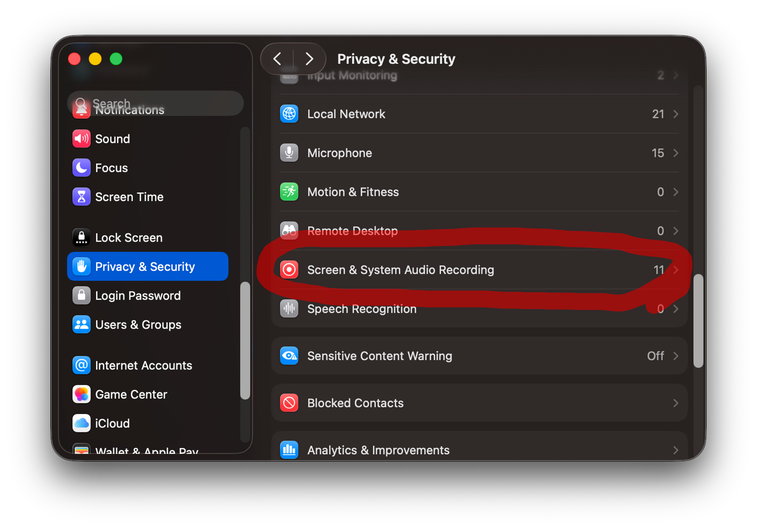
Navigate to the permission category where system audio access is controlled.

  • Open System Settings.
  • Go to Privacy & Security.
  • Select Screen & System Audio Recording.
macOS Privacy and Security Screen and System Audio Recording settings

macOS

Step 2. If COALA-LiVE already appears, allow it

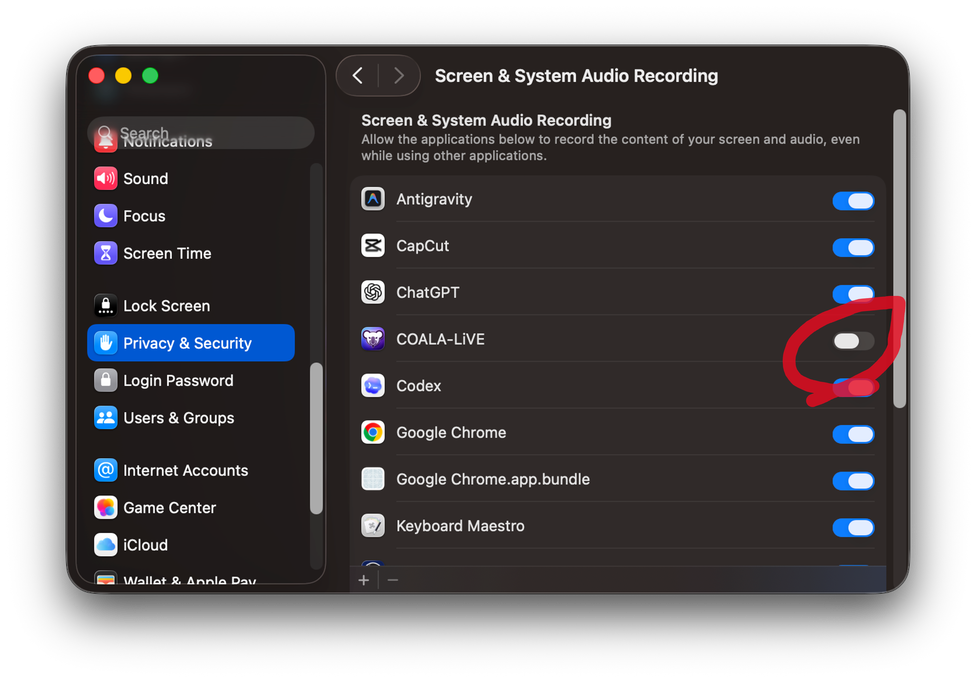
When the app is already listed, simply turn on permission for that entry.

  • Find COALA-LiVE in the app list.
  • Set permission to Allow.
  • If prompted, restart COALA-LiVE to apply the change.
macOS app list showing COALA-LiVE permission enabled

macOS

Step 3. If COALA-LiVE is missing, add it with "+"

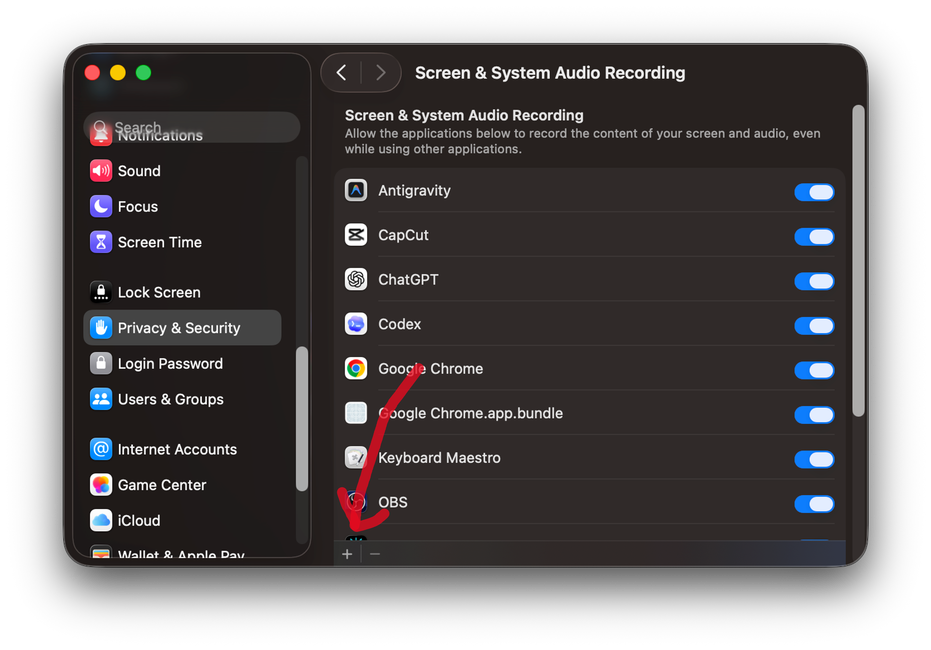
Add the app manually to grant recording access.

  • Click the + button inside Screen & System Audio Recording.
  • Choose Applications -> COALA-LiVE -> Open.
  • Confirm the permission prompt and relaunch the app if needed.
macOS plus button flow for adding COALA-LiVE

B. Windows setup

Set your PC speaker as the default playback device

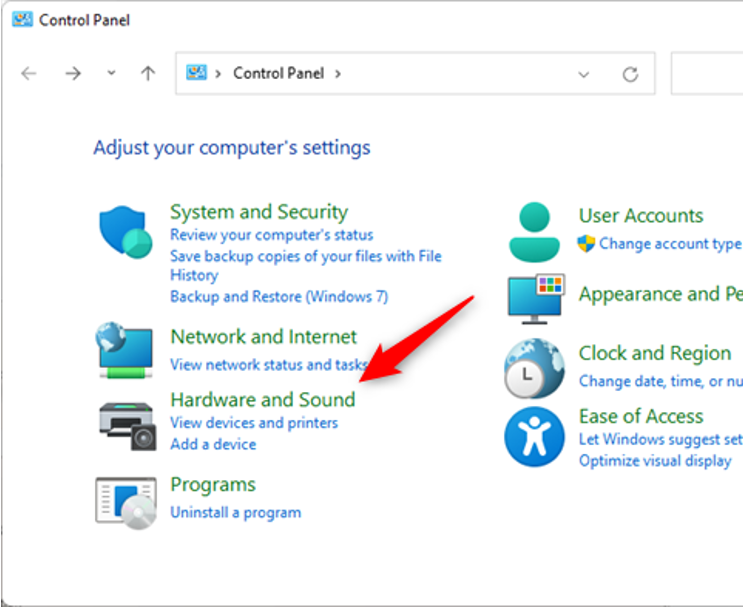
If meeting audio is routed to another output device, COALA-LiVE capture can fail or appear silent. Confirm the default speaker route below.

Windows

Step 1. Open Control Panel

Start from the taskbar search.
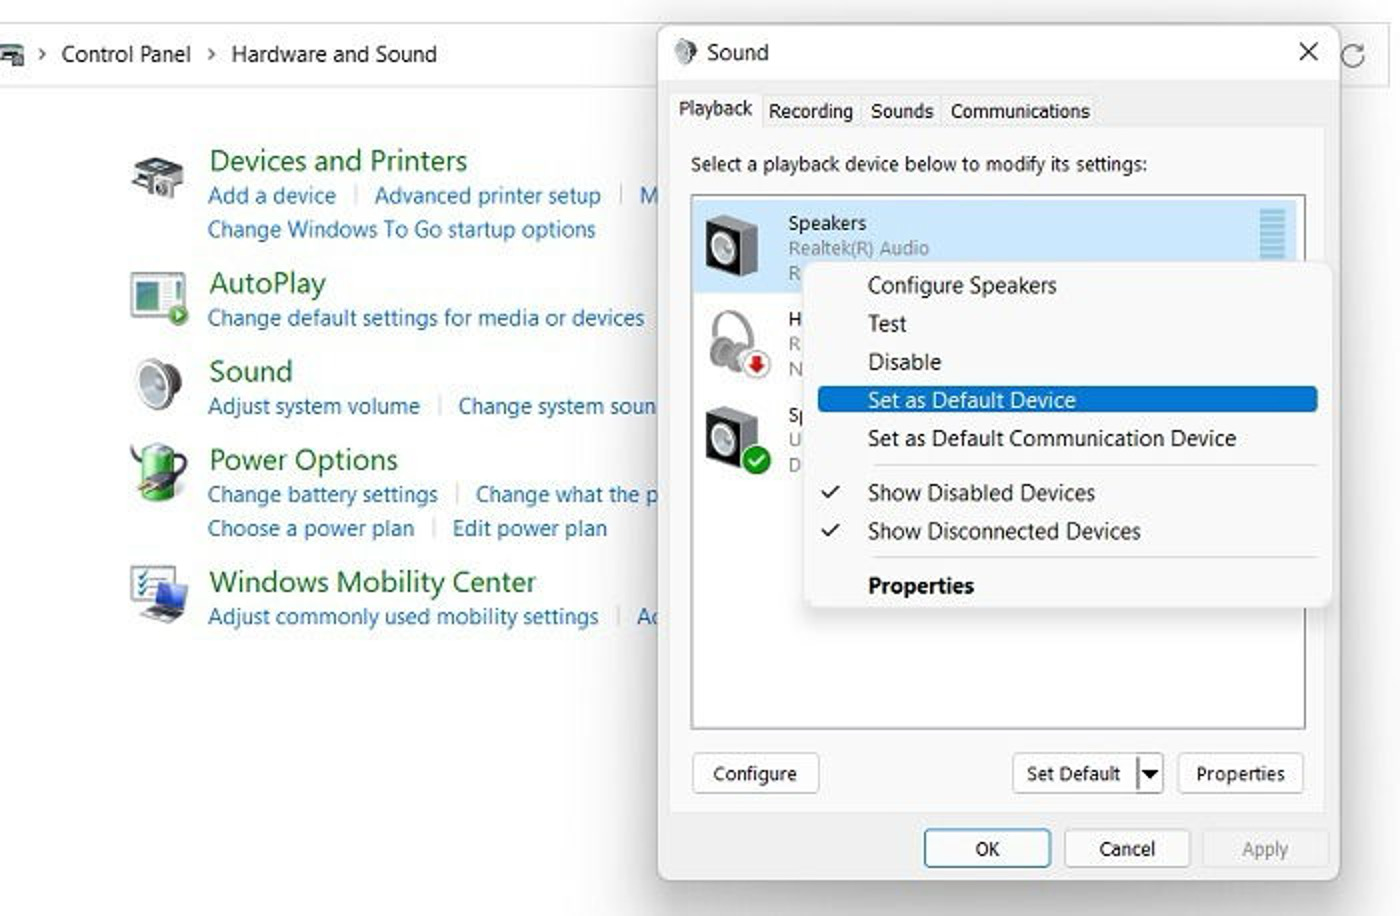
  • Click the taskbar search box.
  • Type Control Panel.
  • Open the Control Panel app.
Windows taskbar search opening Control Panel

Windows

Step 2. Move to Sound settings

Use the standard Control Panel route when View by is set to Category.

  • Open Hardware and Sound.
  • Click Sound.
  • If Sound is already visible, open it directly.
Windows Control Panel path to Hardware and Sound and Sound

Windows

Step 3. Select internal speakers in Playback

Typical names include Realtek speaker labels or internal speaker device names.
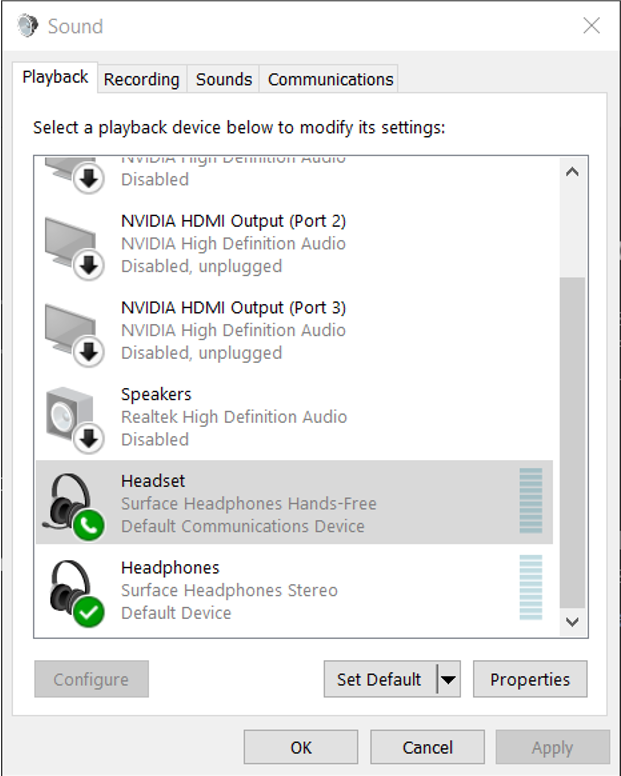
  • In the Sound window, open the Playback tab.
  • Find one of: Speakers (Realtek(R) Audio), Speakers / Internal Speakers, or vendor speaker label.
  • A green check means it is already default; gray means it is not default.
Windows Playback tab with PC speakers selected

Windows

Step 4. Set PC speakers as default device

Use either the button action or right-click menu.
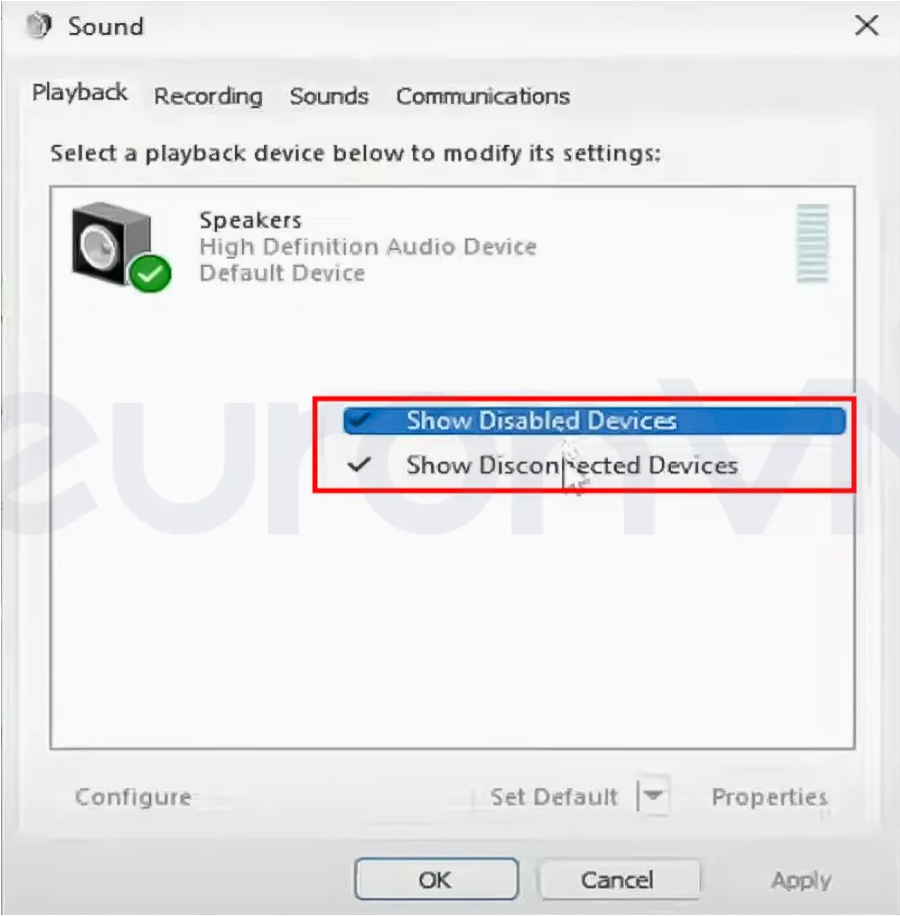
  • Click the target speaker item.
  • Choose Set Default (or right-click -> Set as Default Device).
  • Click OK to confirm.
Windows sound device set as default

Windows

Step 5. If speakers are missing, show disabled/disconnected devices

Recover hidden devices, enable them, then set default again.

  • Right-click an empty area in the Playback list.
  • Enable Show Disabled Devices and Show Disconnected Devices.
  • When the speaker appears, right-click -> Enable -> set as default.
Windows playback menu showing disabled and disconnected devices

C. Windows troubleshooting

Resolve blocked downloads and execution prompts

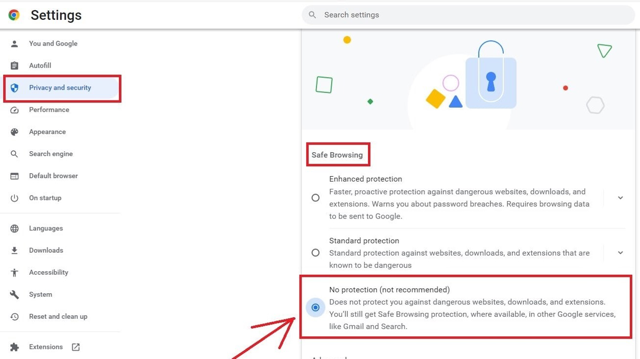
Windows browsers and Defender may block installer downloads. Follow the matched scenario below and restore default protection as soon as setup is complete.

Important safety reminder

Any SmartScreen or Safe Browsing relaxation should be temporary for setup testing only. Turn protections back on immediately after COALA-LiVE install succeeds.

Windows

Scenario 1. Edge marks the file as risky

Use Edge security settings and keep the blocked item from the download bar.

  • Open Edge menu (...) -> Settings -> Privacy, search, and services.
  • Under Security, temporarily turn off Microsoft Defender SmartScreen.
  • Also turn off Potentially unwanted app blocking during setup.
  • If already blocked, open download bar menu (...) and select Keep.
Edge SmartScreen and potentially unwanted app blocking settings

Windows

Scenario 2. Chrome blocks the installer download

Temporarily reduce Safe Browsing level and keep the file from download history.
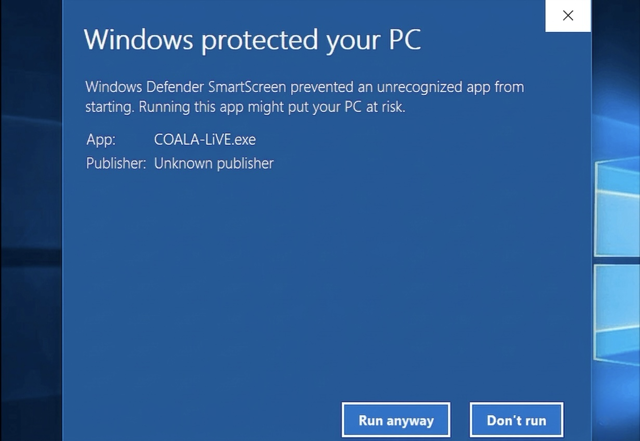
  • Go to chrome://settings/security.
  • Temporarily select No protection for setup testing.
  • In Downloads, click Keep for the blocked installer.
  • Restore standard Safe Browsing after installation completes.
Chrome Safe Browsing settings and blocked download keep option

Windows

Scenario 3. Defender popup says Windows protected your PC

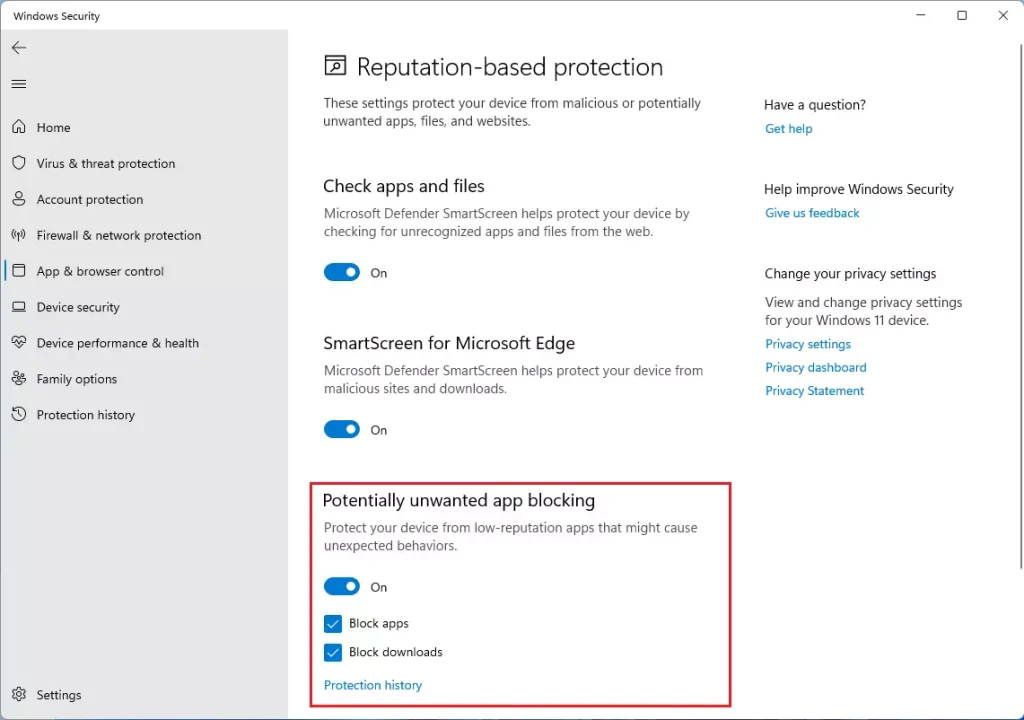
This block is from Windows security, not the browser itself.
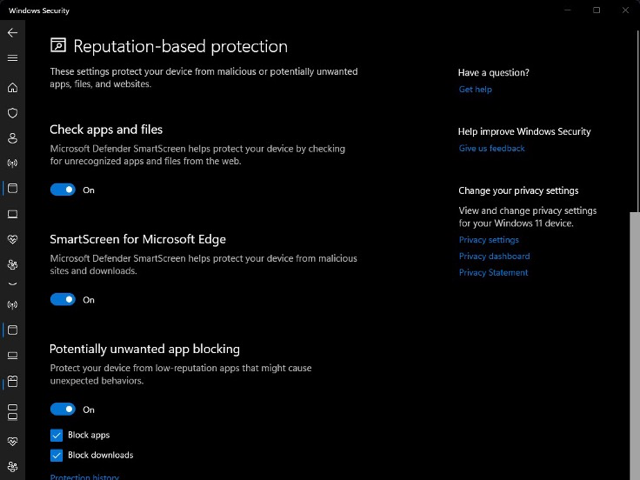
  • On the popup, click More info.
  • Then click Run anyway.
Windows Defender popup with More info and Run anyway

Windows

Scenario 4. Adjust Reputation-based protection temporarily

Use Windows Security route when repeated blocking continues.
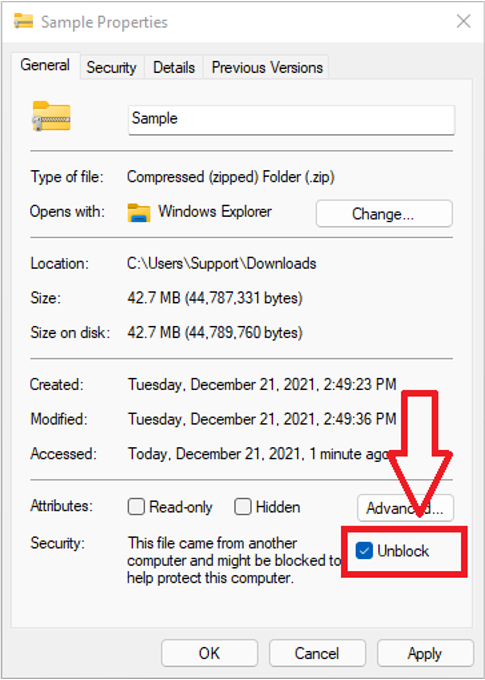
  • Open Settings -> Privacy & security -> Windows Security.
  • Go to App & browser control.
  • Open Reputation-based protection settings.
  • Temporarily disable options such as Check apps and files and SmartScreen toggles.
Windows Security reputation-based protection settings

Windows

Scenario 5. Unblock a specific installer file in Properties

Useful for unsigned test builds that keep getting blocked.

  • Right-click the installer file and open Properties.
  • At the bottom, check Unblock.
  • Click Apply then OK.
Windows file properties with Unblock enabled

If this is a managed company PC

Local setting changes may not work under enterprise policy.

  • Common signs: company laptop, MDM/Intune policies, or third-party endpoint agents.
  • Escalate to IT admin with installer hash/signature details and exact block message.
  • Do not keep security protections disabled on managed devices.